Learn how to build a custom deactivation button in Power Apps that captures user input through a modal dialog and saves context to the timeline.
In this blog post, I’ll demonstrate a business scenario where a record needs to be deactivated with a proper reason. Imagine you’re running an auto parts store and an item is no longer available to customers. When deactivating that record, you may want to capture the reason for its unavailability.
By default, Power Apps simply changes the record status from Active to Inactive without giving you the option to specify a reason. To address this, we’ll build a custom deactivation button and a modal dialog. The dialog will include a dropdown for selecting a reason and a text box for adding a description. This information will then be saved to the record’s Timeline. Let’s get started!
Step 1: Creating a custom page to be used as our modal dialog
Before you start make sure you have Enable attachments (including notes and files) option checked on your table.
In your solution, click on New and select App and then click on Page. When your page is loaded, set your screen height to 350 and width to 455. Save your page and name it as CustomDeactivationPage.

Add a ComboBox and TextBox control on your page. The combo box will have two options, Discontinued and Recall. The text box control will be our Description.
Set your combo box control’s Text to “Select” and Items to:
Table({Value:"Discontinued"},{Value:"Recall"})

Add Notes and <your table> to your data sources. In our case the table name is Auto Parts.

Add two buttons, Deactivate and Cancel. And on your App OnStart add:
Set(varRecordId, LookUp('Auto Parts', 'Part Name' = GUID(Param("recordId"))))

Set Deactivate button’s DisplayMode to:
If(ComboBox1.Selected.Value = "Discontinued" Or ComboBox1.Selected.Value = "Recall", DisplayMode.Edit, DisplayMode.Disabled)
In DisplayMode, we are setting the control to be enabled when one of the options selected. Otherwise, control is disabled if Reason is set to Select.
Then, set Deactivate button’s OnSelect property to:
If(
    IsBlank(TextBox1.Value),
    Notify(
        "Please enter a description",
        NotificationType.Error
    ),
    Patch(
        'Auto Parts',
        varRecordId,
        {Status: 'Status (Auto Parts)'.Inactive}
    );
    Patch(
        Notes,
        Defaults(Notes),
        {
            Title: ComboBox1.Selected.Value,
            Description: TextBox1.Value,
            'Is Document': false,
            Regarding: varRecordId
        }
    );
    Back();
)
OnSelect, if there is no Description we are displaying an error message and if a description is entered we are setting the record as Inactive and then adding the Reason and Description to Notes (Timeline) to save the message for custom deactivation.
After this, set Cancel button’s OnSelect to Back();
Back(); closes the modal dialog and returns to the original page.
Step 2: Creating a JS Web resource
Create a javascript file, enter the code below and save it as DisplayDeactivationModal.js
function DisplayDeactivationModal(itemId, context) {
    debugger;
    var thisId = itemId.replace("}", "").replace("{", "");
    var pageInput = {
        pageType: "custom",
        name: "cr976_customdeactivationpage_d9f2c",
        entityName: "cr976_autopart",
        recordId: thisId
    };
    var navigationOptions = {
        target: 2,
        position: 1,
        width: {
            value: 455,
            unit: "px"
        },
        height: {
            value: 440,
            unit: "px"
        },
        title: "Deactivation reason",
    };
    Xrm.Navigation.navigateTo(pageInput, navigationOptions).then(function () {
        if (context !== undefined) {
            if (context.data !== undefined) {
                context.data.refresh();
                context.getControl("Timeline").refresh();
            } else {
                context.refresh();
            }
        }
    });
}
Import this web resource the your solution and publish it.

Step 3: Adding Deactivate buttons (Main grid and Main form)
This is the final step. We will add one button for the main form and another one for the main form because the original Deactivate button is displayed in both places.
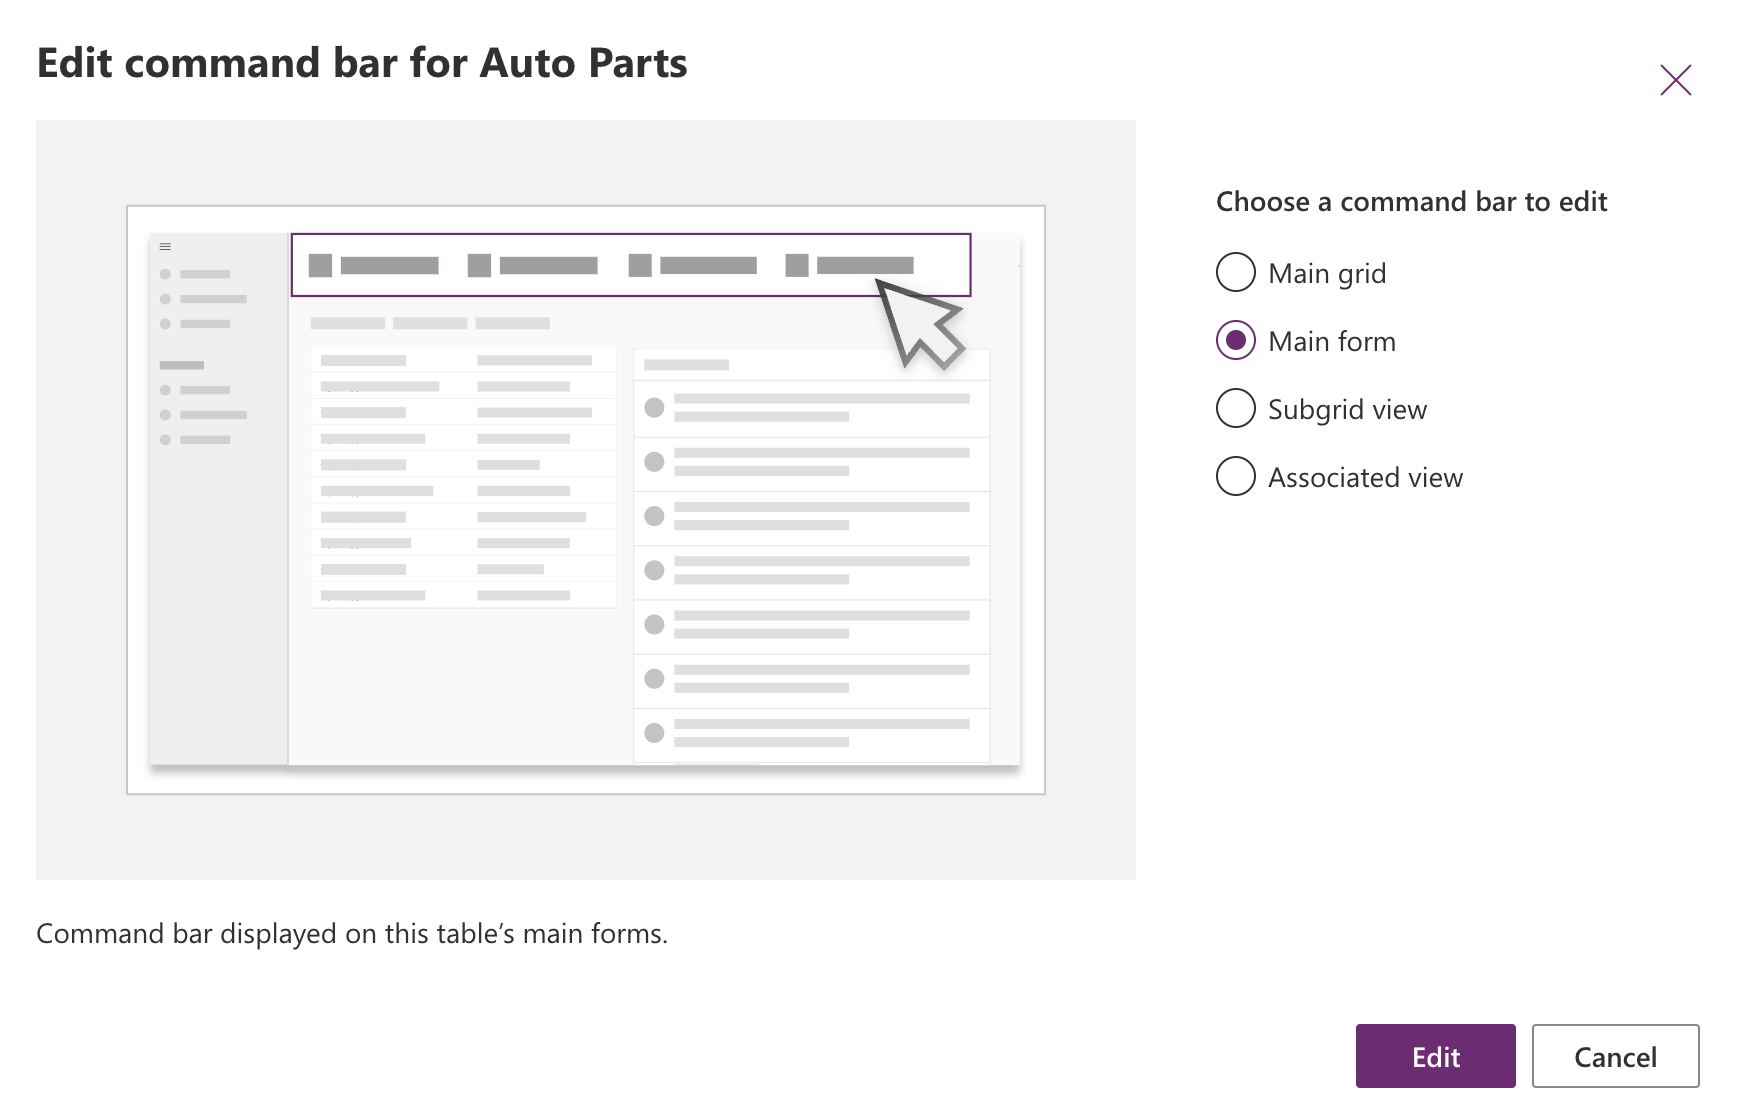
Open your app in edit mode and on Navigation panel click … on your view and click on Edit Command bar. And then on the next screen select Main grid.


On Main grid screen, Hide original Deactivate button and create a new button and then name it as Deactivate.

Configure your button same as shown below, and for the visibility formula enter the code below in formula bar. This code enables the deactivation button only if one item is selected in grid. When you are finished click on Save and Publish.
If(Self.Selected.Item.Status = 'Status (Auto Parts)'.Active && CountRows(Self.Selected.AllItems) = 1, true, false)
Go to Switch command bar and switch to Main form and apply the same steps for Deactivation button to hide the original and create the new one. And then configure your control same as shown below. When you are finished click on Save and Publish.
Now one more step left. We need to add our custom page to our application so when we click on the button it can display our modal dialog. To do that, go back to application’s navigation page and add the custom page to app. Click on New and select Custom page.

Select your page. Uncheck Show in navigation and then click on Add.

Now our custom page is ready to test. Let’s see how does our modal dialog look and let’s try to deactivate a record.
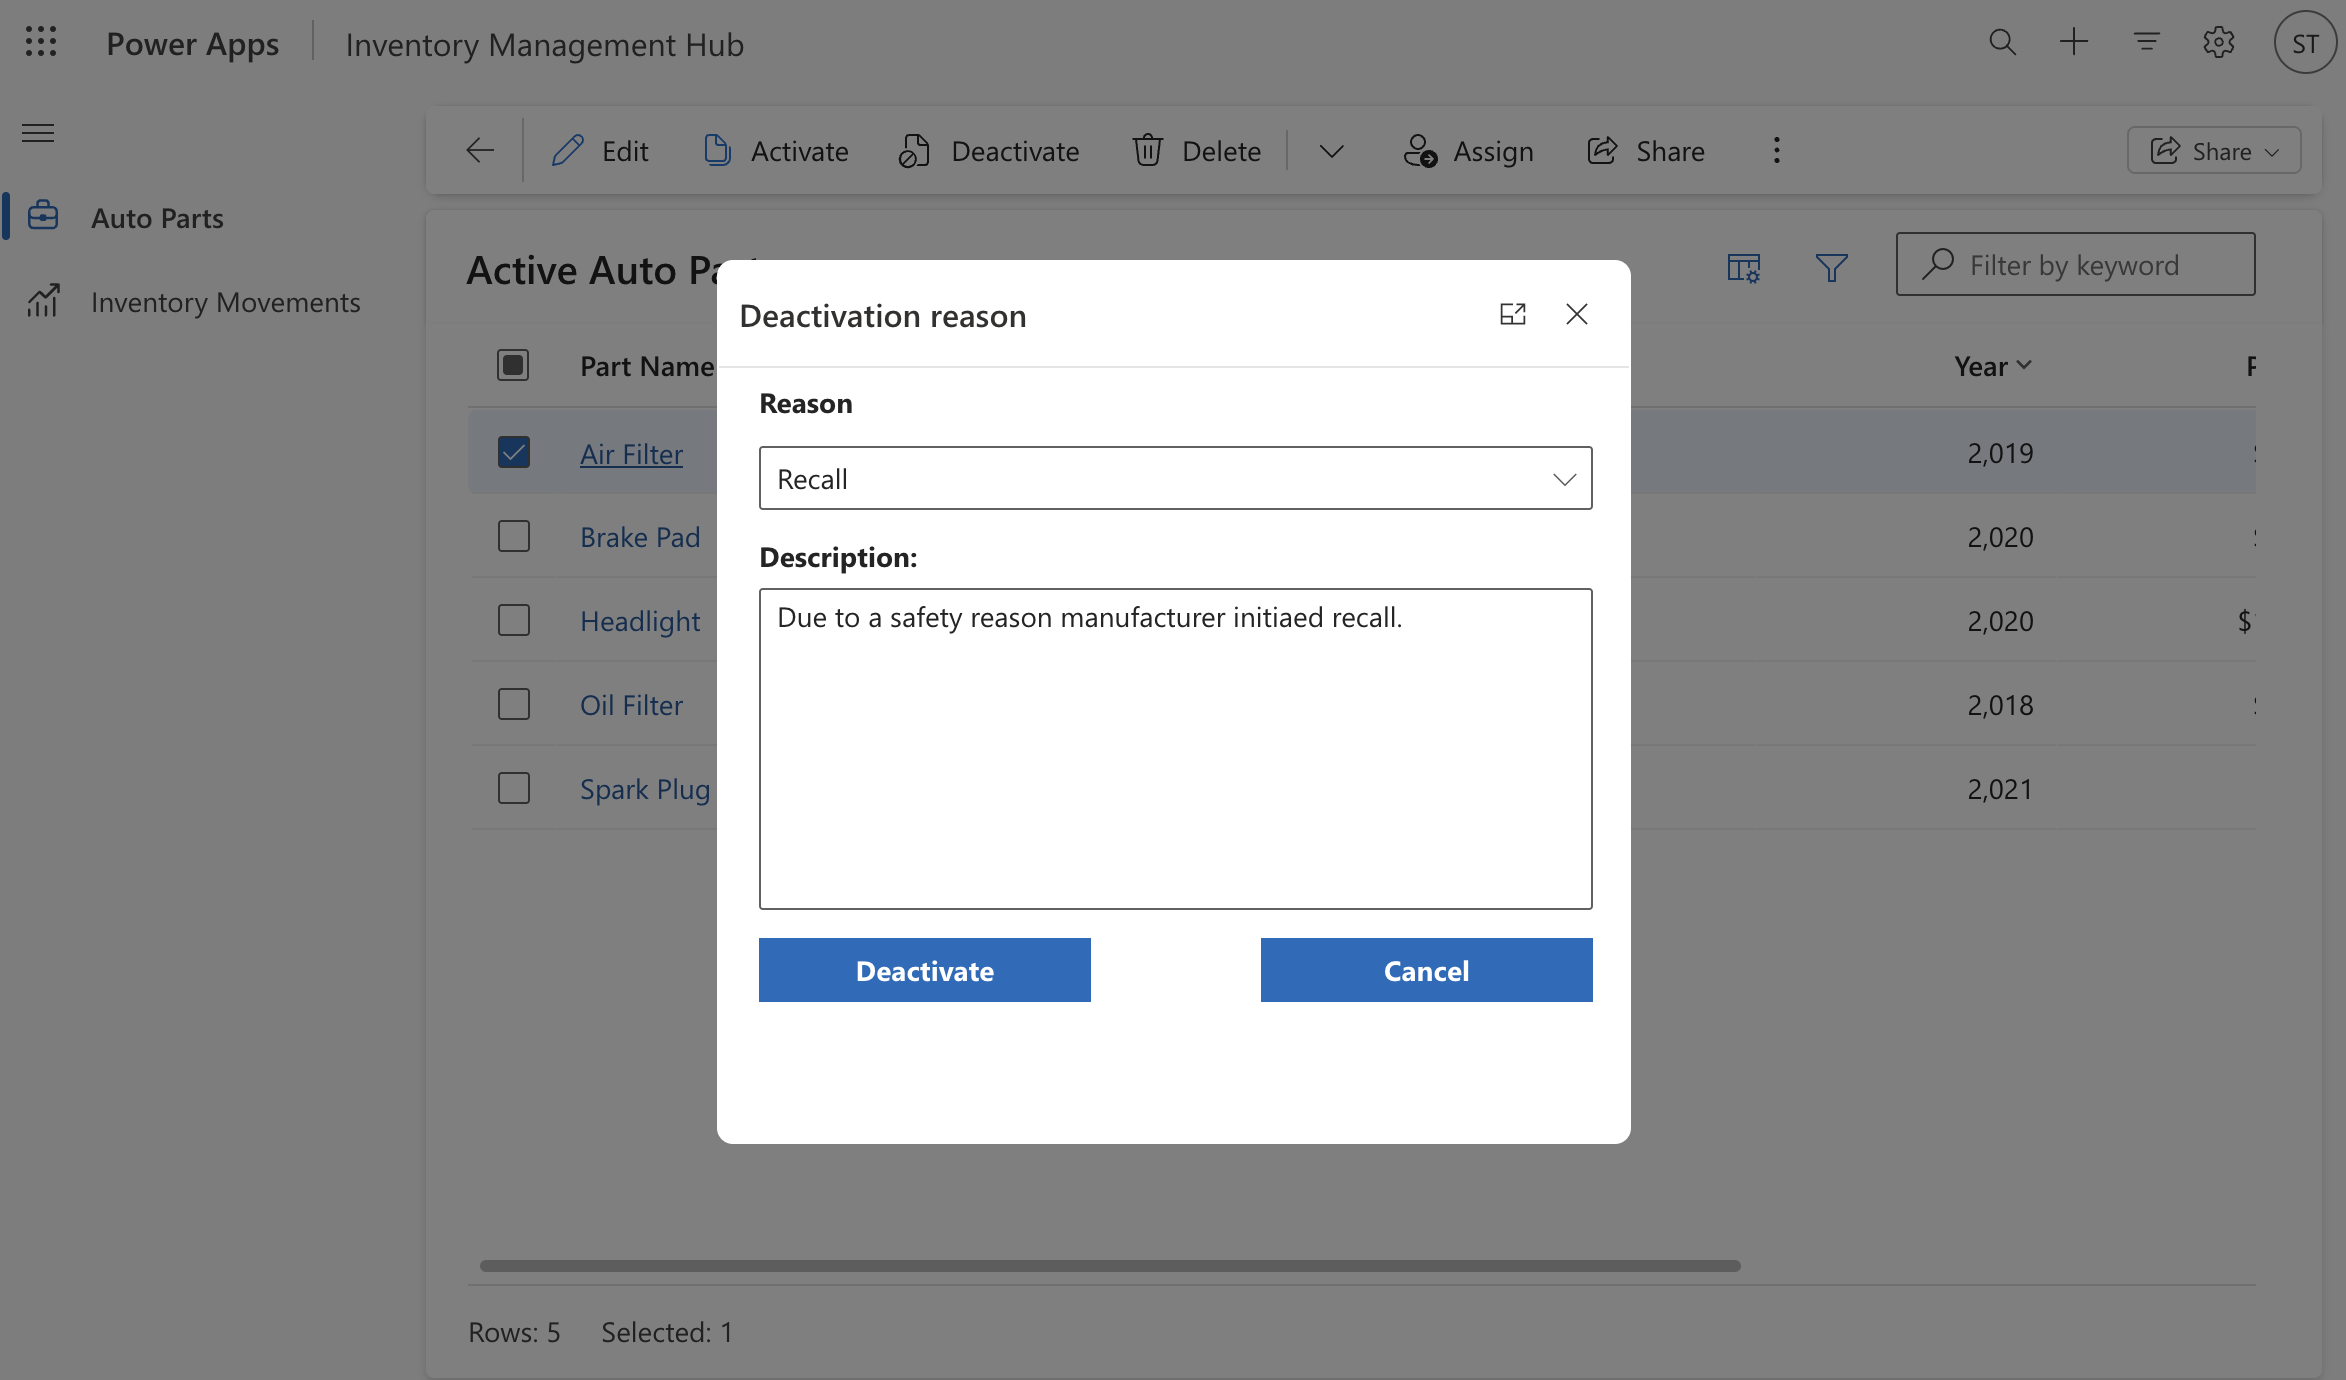
Modal dialog when Deactivate is clicked:
I selected Recall as Reason and added a description for test.

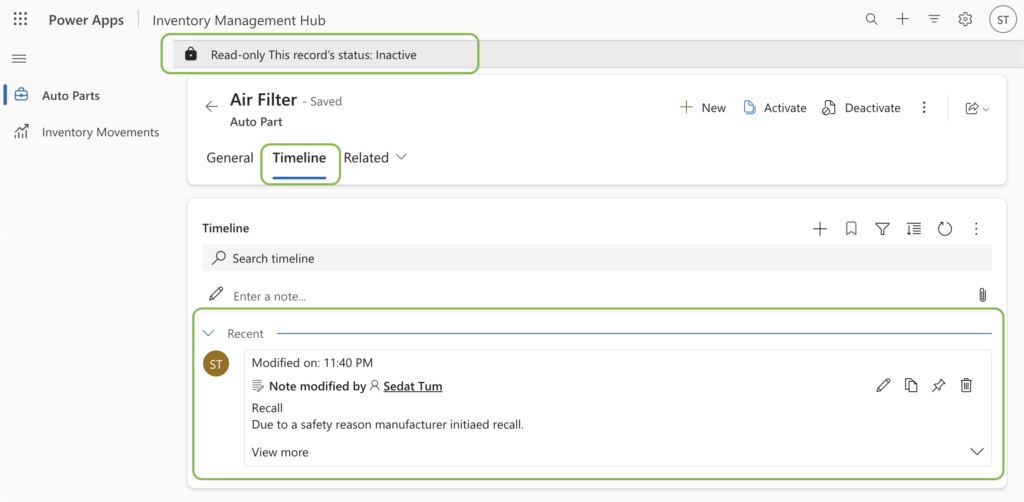
Record after deactivation:
Please don’t forget to test your flow and follow me for future content.🙂