Power Apps empowers administrators and customizers to create a tailored user experience by incorporating custom icons into list views. This powerful feature enables the display of graphics alongside text or numerical values, adding a visual dimension to data representation. In this blog post, I’ll guide you through the process of adding custom icons to list views using JavaScript.
In this example, I created a Model Driven Apps and added existing Account table to display an icon next to account’s Credit Limit column on My Active Accounts view if account’s credit limit is:
- Less than $250,000 then display

- Equal or greater than $250,000 and equal and less than $500,000 then display

- Greater than $500,000 then display

Step-by-Step Guide:
1. Prepare Your Icons and JavaScript File:
- Begin by creating new graphic files for your customization, ensuring an icon size of 16×16 pixels. Icon size cannot exceed 32×32 pixels.
- Icons used in this example are named as red_icon, orange_icon and green_icon.
- Write the JavaScript function that determine which icons to display based on column values. The function should return an array with the image name and tooltip text. I created a JS file called FormatCreditLimit and named my function as formatCreditLimitColumn.
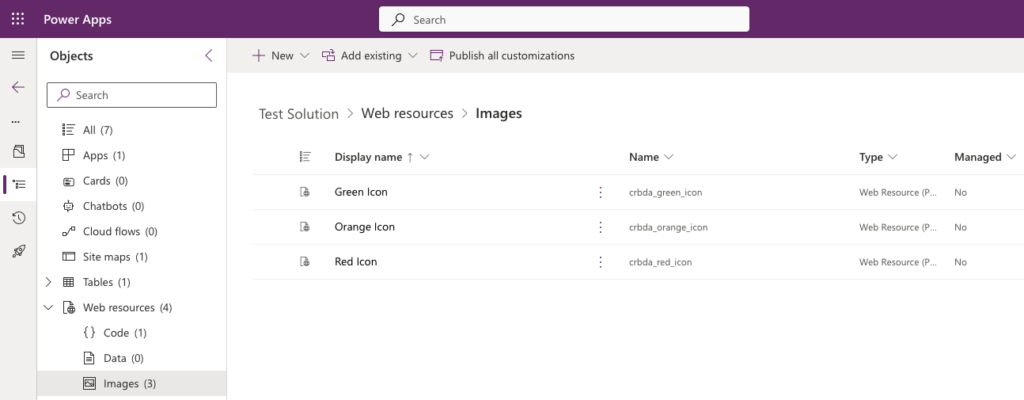
2. Upload Icons and JavaScript File to Web Resources:
- Sign in as an administrator and open the solution explorer in your Power Apps environment.
- Navigate to Components > Web Resources and upload your custom icons one by one. Specify a meaningful name for each resource and set the type to the graphic format (PNG, JPEG, or GIF). All icons will be saved with a prefix from the solution. JS code uses the internal names for the images.
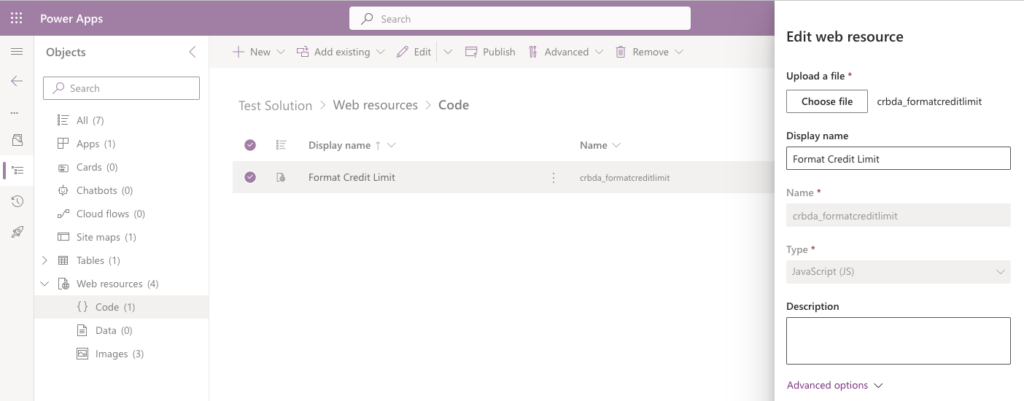
- Create a JS file and paste the code below then save it as FormatCreditLimit.js to your local drive. An important note, you need to add _Value at the end of the column’s internal name in your script to get the value.
function formatCreditLimitColumn(rowData, userLCID) {
    if (rowData === null || rowData === 'undefined') return;
    // Read rowdata
    var str = JSON.parse(rowData);
    // Get credit limit value
    var coldata = str.creditlimit_Value;
    var imgName = "";
    var tooltip = "";
    if (coldata === null || coldata === 'undefined' || coldata.length < 1) return;

    if (coldata < 250000) {
        imgName = "crbda_red_icon";
        tooltip = "Risky!"
    }
    else if (coldata >= 250000 && coldata <= 500000) {
        imgName = "crbda_orange_icon";
        tooltip = "Good"
    }
    else {
        imgName = "crbda_green_icon";
        tooltip = "Excellent"
    }
    var resultarray = [imgName, tooltip];
    return resultarray;
}
- Upload your JavaScript code as the final web resource. Set the type to JavaScript (JS) and click Save.
3. Associate JavaScript with My Active Accounts List View:
- In your solution, expand Tables > Account and select Views.
- Open My Active Accounts view and click on Switch to Classic.

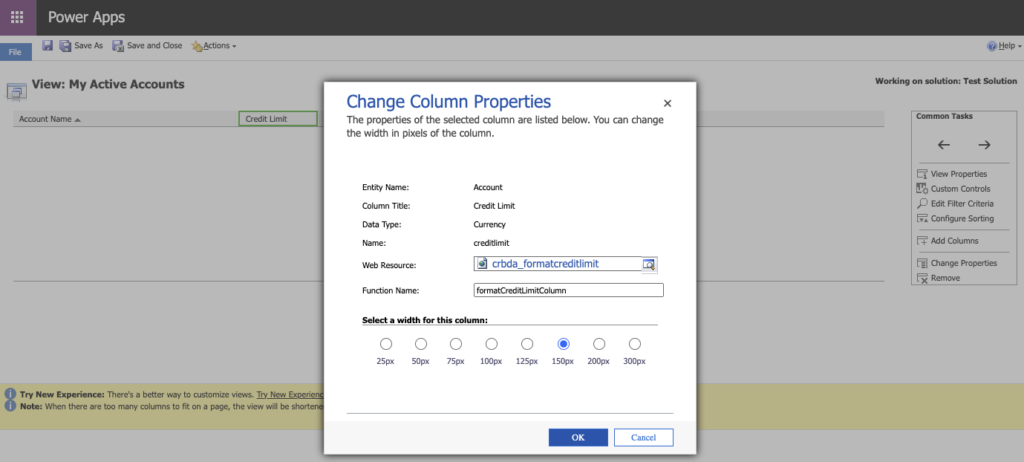
- Select Credit Limit column and click on Change Properties
- Add your Web Resource and type your Function Name then click on OK.
4. Save and Publish:
- Save and close the view editing window.
- When ready, select “Publish All Customizations” to apply your changes in your solution.
Result: Enhancing User Experience with Custom Icons in Power Apps List Views
![]()
Incorporating custom icons into your Power Apps list views is not merely a cosmetic upgrade; it’s a strategic decision to amplify user engagement and comprehension. By seamlessly integrating visual elements alongside textual data, you elevate the overall user experience, making information more accessible and intuitive.
The versatility of this customization option extends across various environments, including the Unified Interface, classic web client, mobile app, and App for Outlook. Whether your users are accessing your application on a desktop or a mobile device, the impact of custom icons remains consistent, providing a cohesive and visually appealing interface.
As you leverage the flexibility and power of custom icons, consider the nuances of your user base. Tailor the visual cues to align with your users’ expectations and preferences, ensuring a user-centric design. This strategic approach not only enhances the aesthetic appeal but also fosters a more efficient and enjoyable interaction with your Power Apps.
In the dynamic landscape of app development, where user experience is paramount, the addition of custom icons to list views in Power Apps is a step towards creating applications that are not only functional but also delightful to use. So, embark on this journey of visual enhancement, and witness how the thoughtful integration of custom icons transforms your Power Apps into a more engaging and user-friendly platform.